Project
Note
For how I coded the technicals, see here. Most of the blog below will show examples of how I implemented stuff onto the project (so mainly pictures and explanations with less code).
Login
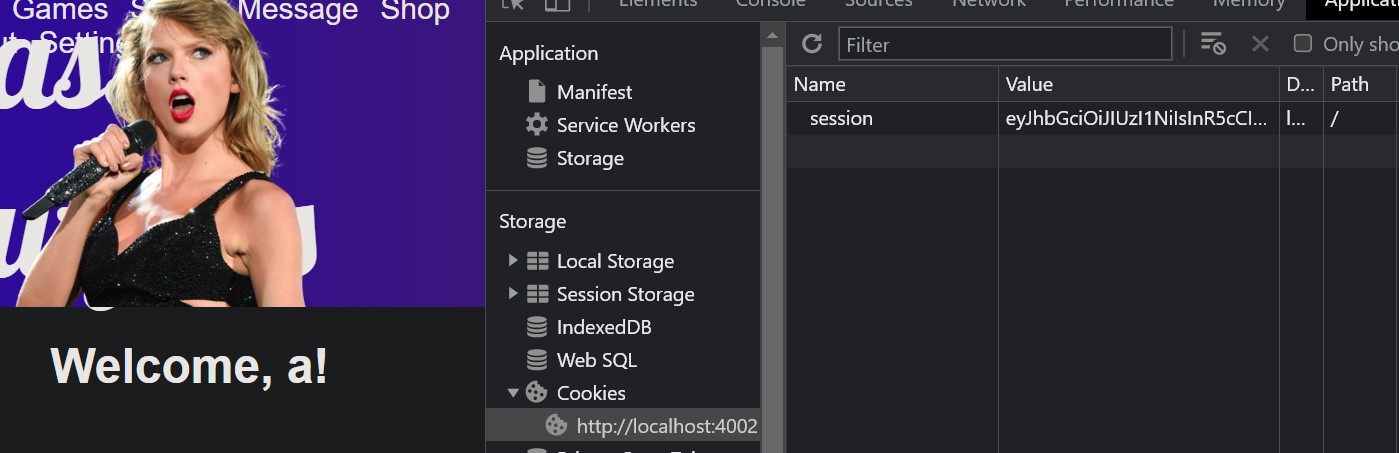
The main feature I worked on for login is a JWT tokens feature. When the user logs in, the frontend sends a fetch request to the backend, which then responds with a cookie. The cookie is added into the browser and looks like this:

The cookie is quite useful, as not only does it keep track of the user’s login status, the username information can also be obtained from the cookie. As such, multiple features on the website can be implemented:
Welcome message and dynamic nav bar
Most of how I used cookies to get these features working is explained here (scroll down to “Implementations”).
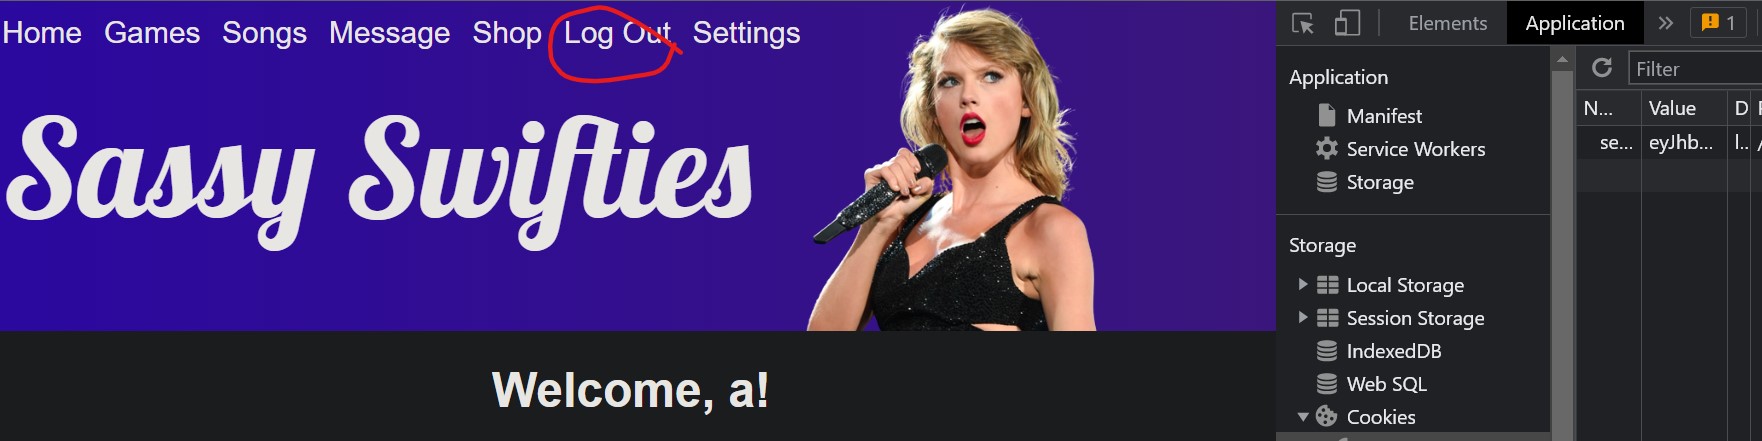
Below are some pictures of it working on the SassySwifties project:
The welcome message is personalized to the username based on the information stored in the cookie.
In the picture below, the navbar shows “Log Out” because of an existence of a cookie.
Settings
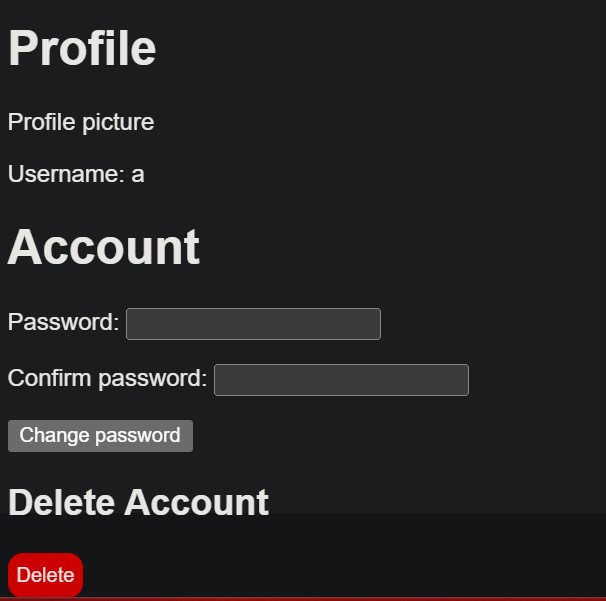
Another feature that was made possible with the use of cookies was the Settings page. Since each user is unique, the Settings page should be tailored to the specific user. As such, features such as listing the username, changing the password, and deleting the account require the use of cookies so that the user information can be first obtained. After that, the frontend can send a fetch request to the backend with the specific id of the user to perform actions such as changing password or deleting account.
Sorting
On the Explore page, users can view a display of Taylor Swift albums with an option to sort the albums with features such as alphabetical order, newest date, or oldest date.
Below shows albums sorted by latest album.

The sorting algorithm that I used was selection sort. The code for selection sort was straightforward, so I won’t go into detail on that.
The second feature on the Explore page was to obtain information about the album:
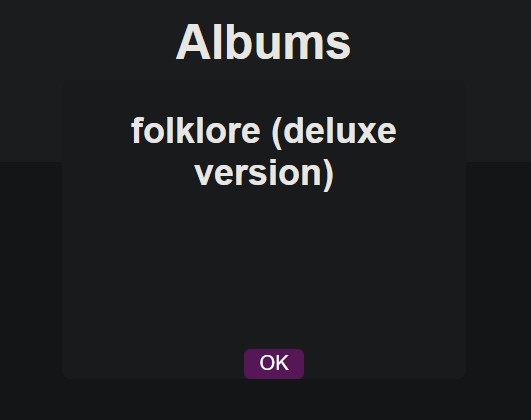
At the moment, the information consists of the album name. It was originally planned to add description about the albums, but I ran out of time to do that. The main code that I used to display the album consisted of CSS.
The first piece of CSS that I created was to resize the images depending on the window size:
@media only screen and (min-width: 550px) {
    .imgResponse {
        width: 33%;
        margin-right: 1em;
    }
}

@media only screen and (min-width: 1000px) {
    .imgResponse {
        width: 25%;
        margin-right: 1em;
    }
}


@media only screen and (min-width: 1500px) {
    .imgResponse {
        width: 15%;
        margin-right: 1em;
    }
}
The other part I had to do was to configure JavaScript to open the popup and close it:
 function openPopup(albumId) {
        console.log(albumId);

        document.getElementById("popupText").innerHTML = "";

        let albumName = "";
        for (let i = 0; i < Object.keys(album).length; i++) {
            if (album[i]["id"] === albumId) {
                albumName = album[i]["album"];
            }
        }

        let h2 = document.createElement("h2");
        let albumNameText = document.createTextNode(albumName);
        h2.appendChild(albumNameText);
        document.getElementById("popupText").appendChild(h2);

        document.getElementById("albumImg").style.display = "none";
        document.getElementById("popup").style.display = "block";

    }

    function closePopup() {
        document.getElementById("albumImg").style.display = "block";
        document.getElementById("popup").style.display = "none";
    }